Jupyter Notebooks, Python and Oracle Installation on Linux
Installing Jupyter-lab and Docker environment on Linux
The following walk-through guides you through the steps needed to set up your enviroment to run Jupyter-lab, Oracle and Docker to build and run docker images for testing. This should work for either an on premises install or on Oracle's cloud using IaaS (Compute). This walkthough will serve primarily as a reminder to myself.
Prerequisites
I'm making the assumption that you're running on Linux (I've a similar walkthrough for mac). In my example I'm using Oracle Enterprise Linux 7 (OEL). I'm also assuming a few other things
- Python 3.6 or higher is installed
- You have access to root either directly or via sudo. In this example I'm installing everything in the Oracle user account that has sudo privelege
- Docker is installed. If it isn't, see this excellent guide. If you aren't running as root also make sure you follow this final step as well.
Install
The install is pretty simple. It consists of setting up python, installing Oracle Instant client, installing Git and then cloning this directory to the server. Lets start with setting up the Python Environment
Python Setup
By default OEL 7 runs Python 2 rather than Python 3 which is likely to change in the future, until then we have a few steps we need to run through. The first is to install pip and virtualenv. We can easily do this on OEL with yum
sudo yum install python36-pip
If this command fails saying something like No package python36-pip available. then you'll need to edit the yum config file at /etc/yum.repos.d/public-yum-ol7.repo and enable the software development repos.
The next step is to install virtualenv. Virtualenv enables us to create isolated sandpits to develop Python applications without running into module or library conflicts. Once we have pip installed it's very simple to install
sudo pip3.6 install virtualenv
Next we can create a virtual environment and enable it.
virtualenv -p /usr/bin/python36 myvirtualenv
source myvirtualenv/bin/activate
This will create a directory called myvirtualenv (you can call it what you like) with it's own version of the python interpreter and pip. Once we "active it", any library we install will only be in this directory and won't effect the system as a whole. You should see you command prompt change when you activate it. It should look something like this
[04:59 PM : oracle@ora18server ~]$ virtualenv -p /usr/bin/python36 myvirtualenv
Running virtualenv with interpreter /usr/bin/python36
Using base prefix '/usr'
  No LICENSE.txt / LICENSE found in source
New python executable in /home/oracle/myvirtualenv/bin/python36
Also creating executable in /home/oracle/myvirtualenv/bin/python
Installing setuptools, pip, wheel...
done.
[05:00 PM : oracle@ora18server ~]$ source myvirtualenv/bin/activate
(myvirtualenv) [05:00 PM : oracle@ora18server ~]$ ls
Desktop       ora18server-certificate.crt  sql    swingbench
myvirtualenv  OracleUtils                  sqlcl  wallet
(myvirtualenv) [05:00 PM : oracle@ora18server ~]$
Running the following command will show what Python models we have installed at this point.
(myvirtualenv) [05:00 PM : oracle@ora18server ~]$ pip list
Package    Version
---------- -------
pip        19.0.3
setuptools 40.8.0
wheel      0.33.1
Which shouldn't be very many.
Git Installation
We now need to install Git which is useful for managing and versioning code. That might not be a requirement for you but it also makes it very simple to clone existing repostories. Installing it is very simple.
sudo yum install git
We can now clone my IPython/Jupyter notebooks from github which provides you with the code for creating your own Oracle Docker Images.
git clone https://github.com/domgiles/JuypterLabWork.git
This will create a directory call JuypterLabWork
Installing Oracle Instant Client
One of the recent updates to Oracles install models is the support for RPMs and yum installations without the need for click through agreements. This makes it very simple to install a client with a single command
sudo yum install oracle-instantclient18.3-basic
This will typically install the the software into /usr/lib/oracle/18.3
Installing Jupyter-Lab
In the JupyterLabWork directory that was created when we ran the git clone command there's a file called requirments.txt. This is a list of modules needed to run the notebooks in that directory. To install them all you need to do is to run the command
pip install -r requirements.txtThis will install all of the needed modules. From there all we need to do is to run the command
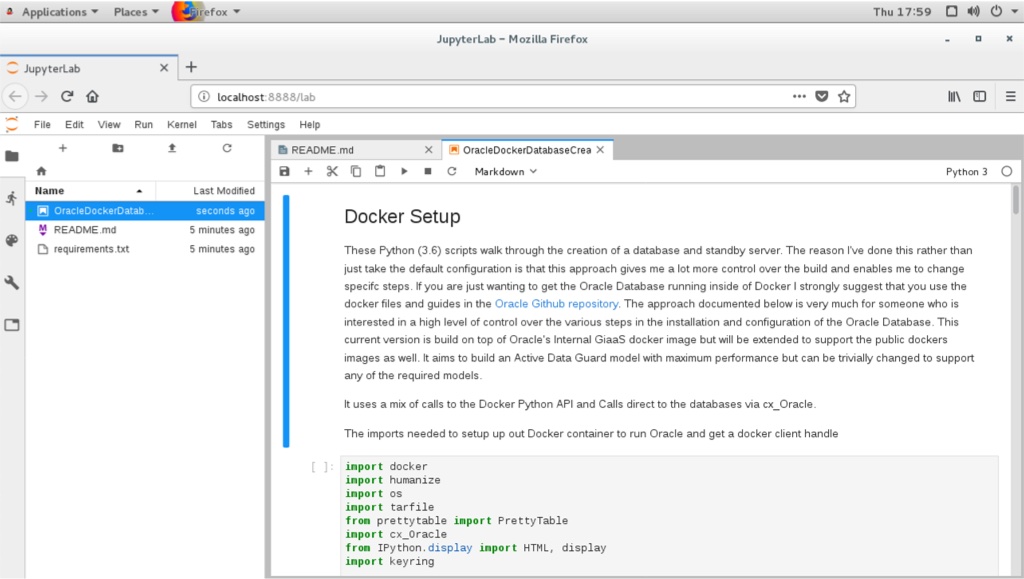
jupyter-labIf you're running directly on a workstation or virtual machine and have a browser installed it should take you directly into the jupyter environment.

If you're running headless then when jupyter-lab starts it should give you a url that you can connect to. Look for something like
[I 12:52:30.450 NotebookApp] The Jupyter Notebook is running at:
[I 12:52:30.450 NotebookApp] http://oracle18cserver:8888/?token=f71e677e202f5fffc3d20fe458ff973e616e0dc3b8eaf072
[I 12:52:30.450 NotebookApp] Use Control-C to stop this server and shut down all kernels (twice to skip confirmation).
That's it.