Large Scale Order Entry Benchmark
NOTE : In Swingbench 2.4 the following isn’t necessary. The wizard “oewizard” in the bin directory that will talk you through the entire SH schema creation. The following is only necessary for 2.3
The order entry wizard that is used to create the “SOE” schema in swingbench 2.3 limits its size to 100GB. The reason for this is that it executes as a single threaded operation and would take an unreasonable time to create a schema any larger. Datagenerator is capable of creating much larger schemas that would generate much higher levels of I/O (index lookups). To support these larger schema’s it is reccomended that the following routine is followed.
The installation is a pretty good test of a servers CPU and Memory in its own right.
Generating the data
To install and create larger “SOE” benchmarks you'll need both Datagenerator to create the data and Swingbench to generate the load. The installation guide for swingbench can be found here. The installation guide for datagenerator can be found here.
The “SOE” schema can be installed manually or via the graphical front end or command line. However the simplest and consise mode is to use the scripts located in the $DATAGEN_HOME/bin/scripts/soe directory.
These scripts can be run directly from SQL*Plus as the “SYS” or “SYSTEM” user. Start the installation by running the following command
[dom@etcpro01 soe]$ sqlplus / as sysdba @soe_install
SQL*Plus: Release 11.1.0.6.0 - Production on Tue Sep 2 13:24:31 2008
Copyright (c) 1982, 2007, Oracle. All rights reserved.
Connected to:
Oracle Database 11g Enterprise Edition Release 11.1.0.6.0 - 64bit Production
With the Partitioning, Real Application Clusters, Oracle Label Security, OLAP,
Data Mining, Oracle Database Vault and Real Application Testing options
Order entry username [SOE] :
Order entry password [SOE] :
Default tablespace [SOE] :
Default index tablespace [SOE_INDEX] :
Enter scale. 1 = 1GB, 100=100GB etc [1] : 10
Enter connectstring for database [//etcpro01/PLLR] :
Enter level of parallelism [16] : 24
Generation will now begin. Press return to continue or control C to exit
The script will prompt you for the schema and the password (the user will be created). Hitting return at any stage will accept the default. The default and default index tablespace are the locations into which the data and indexes should be placed. The scale indicates how big the utlimate data set will be. The default config file is sized for 1GB and so a scale of 100 will create 100GB of raw data. The connectstring is used by the datagenerator and should be of the form
//<hostname>/<service>
The final parameter is the level of parallelism to be used. This is typically two times the number of cores in the server.
After the last question is asked, hitting return will begin the schema creation.
The time taken to create the data will depend on the power of the CPU’s and the “scale” specified. The following table indicates shows timings for a 10 scale build. I’ll also include 1 and 10TB builds when I get time on hardware.
| Process |
10GB (hours:min:secs) |
|---|---|
| Tablespace Creation |
00:05:55
|
| Data Generation |
00:11:36
|
| Index Builds |
00:58:56
|
| Schema Analysis |
00:02:48
|
The timings were taken on an unspecified 4 CPU dual core server with a mid range SAN (approx 400MB/sec of I/O).
The sizings for the 10GB tablespaces are
|
SOE
|
SOE_INDEX
|
||||||||
|---|---|---|---|---|---|---|---|---|---|
|
|
I’d be interested in other users timings and configurations and would be happy to post them to a page purely as a reference points. Please send them to me via the comments page here
Running the benchmark
The existing “SOE” config file can be used to generate a workload againt the new schema. However it is advised for large schemas that user first indicate to the load generator the number of “CUSTOMERS” in the schema otherwise this will be calculated at the start of the benchmark which can take a long time. This can be done by first starting swingbench with the command below
$> ./swingbench -c sample/soeconfig.xml
from the bin/winbin directory.
This will launch the following window
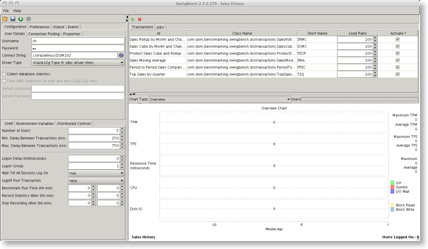
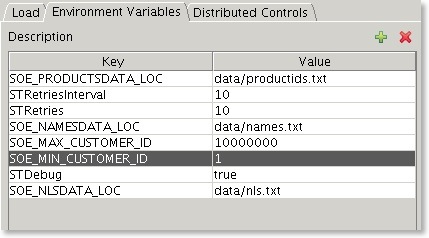
Select the Environment Variables tab and press the

Add two Enviroment variables
- SOE_MIN_CUSTOMER_ID : The value equals the smallest customer id in the data set, usually 1
- SOE_MAX_CUSTOMER_ID : The largerst customer id found in the data set
You can determine what thes values are by running a piece of SQL similar to this when logged into the SOE schema
SELECT
/*+ PARALLEL(CUSTOMERS, 8) */
MIN(customer_id) SOE_MIN_CUSTOMER_ID,
MAX(customer_id) SOE_MAX_CUSTOMER_ID
FROM customers
After adding the variables you should end up with something that looks similar to this
Go back to the “Load” tab and check the rest of the parameters are in line with what you expect and save the configuration via the